REVIEW · OAHU
1 Day Pass LeaLea Trolley and Waikiki Trolley Pink Line
Book on Viator →Operated by LeaLea Tours · Bookable on Viator
One-sentence hook: Waikiki gets a lot easier with trolley rides.
This Pink Line pass is basically your ticket to jump on and off around Waikiki, Ala Moana, and key Honolulu sights without wrestling with parking or timing. I like that the route stitches together major landmarks and hotel clusters, so you can plan a day in chunks—shopping, viewpoints, museums, and a couple of big-name stops.
Two things I’d call out as real wins: the variety of stops (from Iolani Palace to Hanauma Bay photo stops) and the price-to-ride value at $35, especially if you’re trying to cut down on taxi trips. The main drawback to keep in mind: the experience can feel more like a bus-route with frequent stops than a narrated, tour-guide-style drive, and communication/driver knowledge can be uneven.
In This Review
- Key Points to Know Before You Ride
- How the LeaLea and Waikiki Trolley Pink Line Day Pass Works
- Price and Value: What $35 Buys You (and What It Doesn’t)
- Boarding Zones That Make This Pass Easy: Waikiki’s Big Anchors
- Royal Hawaiian Center
- Duke Paoa Kahanamoku Statue
- The Twin Fin Hotel and Hotel La Croix
- Hilton Hawaiian Village (Grand Islander 1F)
- Ala Moana and the Midway Shopping Blocks
- Big Honolulu Sights: Downtown Culture Without the Taxi
- HoMA (Honolulu Museum of Art)
- Hawaii State Capitol and nearby viewpoints
- Foster Botanical Garden
- Bishop Museum
- Izumo Taishakyo Mission of Hawaii
- Iolani Palace and King Kamehameha Statue
- Neal S. Blaisdell Center
- Kaka’ako and Ward Area Stops: Street Food Potential Without the Detour
- Diamond Head, Kaimuki, and the East Side: Views With Limited Time
- KCC Farmers’ Market
- Diamond Head Crater
- Kaimukī and Kahala Mall area
- Safeway and the shopping centers
- The Coastline Highlight: Hanauma Bay and Halona Blowhole Photo Stops
- Zoo, Aquarium, and Sea Life Park: Animal Attractions Without Needing Transfers
- Honolulu Zoo and Waikiki Aquarium
- Sea Life Park Hawaii
- Shopping and Food Loops: From DFS to International Market Place
- A Note About the Ride Experience: More Stop-and-Go Than Guided Commentary
- Best Use Cases: Who This Pass Fits Well
- Quick Tips to Make It Work Smoothly
- So, Should You Book It?
- FAQ
- FAQ
- What is included with the LeaLea Trolley and Waikiki Trolley Pink Line pass?
- Are entrance fees for museums or attractions included?
- How long is the experience?
- What language is offered?
- Where does the route operate?
- What time is it available each day?
- How far in advance should I book?
- What is the cancellation policy?
- Will I receive confirmation after booking?
Key Points to Know Before You Ride
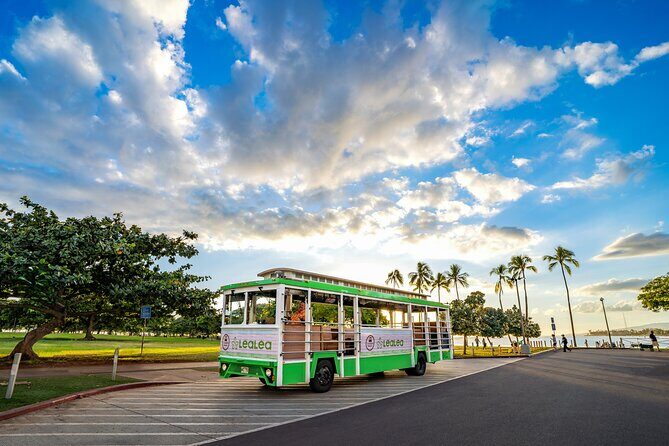
- Lots of hotel-area pickup points means you can start and restart your day without crossing the whole island on foot.
- Big landmark clustering: you’ll pass by or reach places like Bishop Museum, Iolani Palace, and Diamond Head without extra planning.
- Photo-stop time is limited (like Hanauma Bay and Halona Blowhole), so treat those as quick look-and-shoot stops, not long visits.
- Admission fees are not included, so plan separate tickets for places that charge.
- If you drive, parking confusion can cost money, so check where you’re supposed to park before you arrive.
- English is the service language, but don’t assume detailed commentary at every stop.
How the LeaLea and Waikiki Trolley Pink Line Day Pass Works
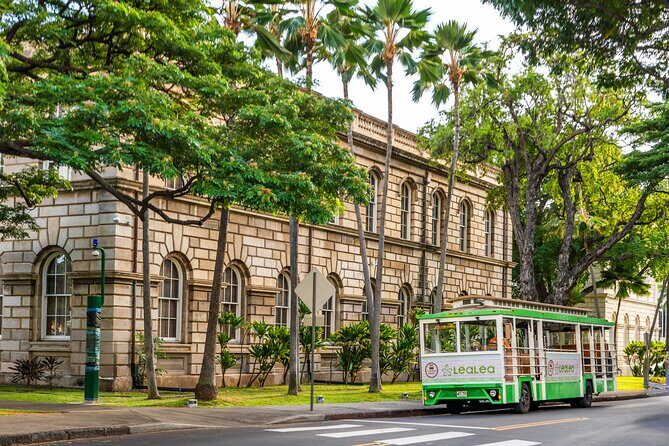
This is sold as a one-day pass experience, but the timed ride window is listed at about 3 hours (approx.). In practice, think of it like: you’re paying to ride the Pink Line route, and then you use that time to get off where you want to spend your hours.
The trolley runs in Oahu’s most visitor-heavy areas, with a lot of stops around Waikiki and Ala Moana first. From there, the route stretches outward to classic Honolulu destinations and scenic coastline viewpoints.
The pass is English-only, and the schedule is available daily from 8:00 AM to 5:00 PM. If your goal is to keep moving and hit multiple neighborhoods, that time range helps. If your goal is slow sightseeing with lots of museum time, you’ll probably feel rushed.
You can also read our reviews of more tours and experiences in Oahu

Price and Value: What $35 Buys You (and What It Doesn’t)
At $35 per person, this is the kind of deal that makes sense when you’re trying to reduce transport stress. You’re not paying for admissions—this is only the trolley pass—so your value depends on how many paid attractions you would otherwise add.
Here’s the practical math: if you’d otherwise take a couple taxi or ride-share hops between Waikiki, Ala Moana, and downtown, the trolley pass can feel like a bargain fast. If you mainly want one beach day with zero side trips, it may be overkill.
Also remember: some parts of the route are “get off for a look” style stops (like the 15-minute photo stops). You’ll still enjoy them, but don’t plan your whole day around those short windows.
Boarding Zones That Make This Pass Easy: Waikiki’s Big Anchors
Your day starts and loops through major Waikiki and near-Waikiki points, which is the real reason this works. The trolley repeatedly returns to the same anchors, like Royal Hawaiian Center, so you can hop off, wander, and then rejoin when you’re ready.
Here are the Waikiki anchors and why they matter:
Royal Hawaiian Center
This is one of the core “gravity points” on the route. It’s a strong starting place because you can walk around shopping and food nearby, then immediately connect to the trolley system. If you’re driving, double-check parking instructions—one reported pain point was unclear parking direction and a $2.50 charge for 20 minutes at Royal Hawaiian Center. That’s small money, but it adds up fast if you’re circling.
Duke Paoa Kahanamoku Statue
This is one of those famous Waikiki landmarks that helps you get your bearings fast. Even if you don’t stay long, it’s a good marker for where you are in the Waikiki world.


The Twin Fin Hotel and Hotel La Croix
These stops are mostly about convenience: you’re right in the Waikiki hotel zone, where it’s easy to grab snacks and keep your day moving. If you’re staying in that general area, the trolley becomes your transportation shortcut without complicated routes.
Hilton Hawaiian Village (Grand Islander 1F)
This stop is huge for ride planning. It’s a central hotel complex, and because the trolley hits it more than once, it’s easier to reset your day without backtracking.
Ala Moana and the Midway Shopping Blocks
You’ll hit Ala Moana Center, plus several nearby commercial stops, including Don Quijote, Walmart, and Prince Waikiki. These are great for practical stuff: groceries, sunscreen, a quick meal, or replacing anything you forgot. It’s not romantic, but it’s useful.
Big Honolulu Sights: Downtown Culture Without the Taxi
One of the best uses of this trolley pass is riding the “downtown and museum” stretch. This is where you start getting into the cultural core of Honolulu, and you don’t need to pre-arrange rides.
You can reach stops such as:
- Honolulu Museum of Art (HoMA) (bus stop #43)
- Hawaii State Capitol
- Foster Botanical Garden
- Bishop Museum
- Izumo Taishakyo Mission of Hawaii
- Iolani Palace (and the King Kamehameha Statue)
- Neal S. Blaisdell Center
Here’s how I’d treat each, time-wise:
HoMA (Honolulu Museum of Art)
Good for a structured break when the sun is high. If you like art, it’s a solid stop—just remember the admission part isn’t included, so check ticket needs ahead.
Hawaii State Capitol and nearby viewpoints
This area can be a quick “walk and look” moment. It’s more about atmosphere and landmark spotting than a time-killer unless you plan to go inside.
Foster Botanical Garden
If you want a calmer moment and don’t mind paying admission separately (not included), this is where you can swap city heat for garden shade.
Bishop Museum
This is a big-name reason people come to Honolulu. Since entry isn’t included, you’ll want to time your trolley ride so you can actually spend meaningful time there, not just see the front.
Izumo Taishakyo Mission of Hawaii
A quieter, more spiritual stop. Even if you only spend a short time outside, the location feels distinct compared to the modern Waikiki strip.
Iolani Palace and King Kamehameha Statue
This is one of those “do it once” landmarks. Iolani Palace can eat time, so be realistic about your overall trolley window. If you’re only riding for about 3 hours total, you may want to pick one major indoor stop rather than trying to do all of them.
Neal S. Blaisdell Center
Good for a transit-style reset. It’s not the kind of stop you plan a whole visit around, but it helps keep the route connected if you’re trying to hit more than one neighborhood.
Kaka’ako and Ward Area Stops: Street Food Potential Without the Detour
The route also touches Kaka’ako and Ward Village, including SALT at Our Kaka’ako and Ward stops along Ala Moana Boulevard. These are the kinds of areas where it’s easy to grab a snack and keep moving, which fits perfectly with a trolley pass.
Why it works: you’re not stuck in a single neighborhood. You can land in a lively commercial area, eat, and then return to Waikiki without needing to re-plan transport.
SALT and the Ward Village zone are also useful for people who prefer flexible travel. If you’re not sure what you’ll want to eat yet, these are convenient places to decide on the fly.
Diamond Head, Kaimuki, and the East Side: Views With Limited Time
The Pink Line doesn’t only do Waikiki. It reaches toward the Diamond Head direction and beyond, and that’s where the day turns from shopping and hotels into scenery and local neighborhoods.
On this part of the route, you’ll see stops like:
- KCC Farmers’ Market
- Diamond Head Crater (a key viewpoint stop)
- Kahala Mall
- Kaimukī Community Park
- Miro Kaimuki
- Market City Shopping Center
- Safeway
- Side Street Inn On Da Strip
- Plus return-to-hotels segments
Then you get scenic photo windows tied to the coastline.
KCC Farmers’ Market
This is great for a quick browse or to stock up on snacks and fruit. It works well if you can time it around market hours, but even without a full shopping stop, it’s an easy “step off and walk around” type location.
Diamond Head Crater
This is where you can steal a big view moment. Don’t confuse the trolley stop with a full hike plan. If you want long trail time, you’ll need a different schedule—but for photo angles and orientation, it’s useful.
Kaimukī and Kahala Mall area
This is more “neighborhood life” than postcard Hawaii. Stops like Kahala Mall and the Kaimukī points are helpful if you want food options without going back to Waikiki every time.
Safeway and the shopping centers
This section is secretly one of the best values. Even a simple stop for water, snacks, or sunscreen can change how enjoyable the rest of the day feels.
The Coastline Highlight: Hanauma Bay and Halona Blowhole Photo Stops
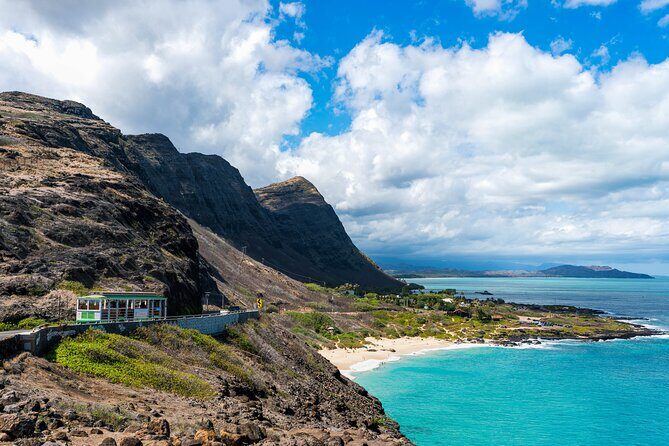
Two of the most striking inclusions on the route are listed as 15-minute photo stops:
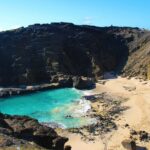
- Hanauma Bay
- Halona Blowhole Lookout
This is a big “yes, but” moment. You’ll see the areas, get the photos, and get your bearings. But 15 minutes is not enough for a full, slow visit where you enjoy views from multiple angles, go down for a longer walk, or do anything that requires time buffers.
So I’d treat this as a stop for postcards and quick impressions. If these are your top two priorities, plan your day around them and don’t spend your trolley time getting distracted elsewhere.
Zoo, Aquarium, and Sea Life Park: Animal Attractions Without Needing Transfers
There’s another route segment focused around family-friendly attractions and coast-adjacent stops, including:
- Honolulu Zoo
- Waikiki Aquarium
- Hanauma Bay photo stop (on the same broad route block)
- Sea Life Park Hawaii
- Koko Marina Center
- Hawaiʻi Kai Towne Center
- Plus return stops around Kahala and Diamond Head Market & Grill
If you want animal attractions, this is a practical way to avoid juggling multiple rides. The catch is the same as everywhere: admissions aren’t included, so you’ll be paying those separately if you want entry.
Honolulu Zoo and Waikiki Aquarium
These are good choices when you want to break up the heat and keep the day moving. Aquarium-style stops also tend to be easier to enjoy even if the day is a bit windy.
Sea Life Park Hawaii
This can take more time than people expect. If your trolley ride window is about 3 hours total, you might not fit both a museum and Sea Life Park. Choose one major indoor/outdoor attraction and let the trolley do the transport.
Shopping and Food Loops: From DFS to International Market Place
Back in Waikiki, the trolley swings past major shopping anchors too, including:
- Waikiki Shopping Plaza (DFS)
- Marugame Udon (International Market Place)
- Plus additional hotel and shopping stops like Ilikai Hotel, Hale Koa Hotel, and Ka La’i Waikiki Beach (LXR Hotels & Resorts)
This part matters because it keeps your day practical. Shopping streets are convenient, but the biggest win is food access. Being able to hop between food blocks without coordinating transit makes the day feel easier.
Also, if you’re tired, you can rest your legs between stops. That’s a real advantage in a place where walking can add up fast.
A Note About the Ride Experience: More Stop-and-Go Than Guided Commentary
One downside that’s worth taking seriously: the trolley can feel more like a sequence of stops than a guided tour with deep explanations. There have been complaints about the driver’s understanding and knowledge, and the Diamond Head segment has been described as basically a lot of bus-stop hopping.
So here’s my advice: don’t buy the pass expecting a full narration experience. Bring curiosity, but keep expectations realistic about how much context you’ll get while riding.
If you want the most out of it, use the trolley as your transportation backbone, then do your real learning during the actual stop visits—where you can read signage and explore at your own pace.
Best Use Cases: Who This Pass Fits Well
This is a strong pick if:
- You want to cover multiple neighborhoods in one day
- You’d rather pay $35 for trolley rides than guess your way through taxi timing
- You like a plan with flexible get-off points
- You can pick a couple major sights and skip trying to do everything
It might be less satisfying if:
- You’re the type who wants a slow, museum-heavy day with long admissions
- You expect detailed guide commentary from the trolley itself
- Your schedule is tight around photo stops like Hanauma Bay and Halona Blowhole
Quick Tips to Make It Work Smoothly
- Bring a simple plan: choose one big indoor stop (like Bishop Museum or Iolani Palace) and one scenic/photo priority (like Diamond Head or the Hanauma Bay photo stop).
- If driving, expect parking can be confusing around the main boarding area. Check signs before leaving the car.
- Pack water and sunscreen. This route includes outdoor time even when the trolley does most of the transport.
- Treat photo stops as photo stops. If you want more than photos, you’ll need another plan beyond the trolley window.
So, Should You Book It?
If your goal is to use Waikiki and Honolulu as a connected loop—hotels to museums, museums to shopping, and then back to beach areas—this $35 pass can be a smart value. The route makes it easy to build a day around a few key priorities without spending your vacation time figuring out logistics.
I’d book it if you’re flexible and you’re okay with a stop-and-go style ride. I wouldn’t book it if you want a deeply guided experience or if your schedule requires long, uninterrupted time at multiple paid attractions.
FAQ
FAQ
What is included with the LeaLea Trolley and Waikiki Trolley Pink Line pass?
The pass includes only the Trolley Pass. It does not include any admission or entrance fees.
Are entrance fees for museums or attractions included?
No. The tour does not include any admission or entrance fees, so you’ll need to pay separately where required.
How long is the experience?
The listed duration is about 3 hours (approx.).
What language is offered?
The trolley service is offered in English.
Where does the route operate?
It operates in Oahu, USA, mainly covering Waikiki and reaching into Honolulu areas along the Pink Line route.
What time is it available each day?
The service hours are listed as 8:00 AM to 5:00 PM (Monday through Sunday) for the date range shown.
How far in advance should I book?
The average booking time shown is about 14 days in advance.
What is the cancellation policy?
Free cancellation is available, and you can cancel up to 24 hours in advance for a full refund.
Will I receive confirmation after booking?
Yes. Confirmation will be received at the time of booking.