REVIEW · OAHU
3 Hour Sunrise Photo Tour with Malasada
Book on Viator →Operated by Oahu Photo Tours · Bookable on Viator
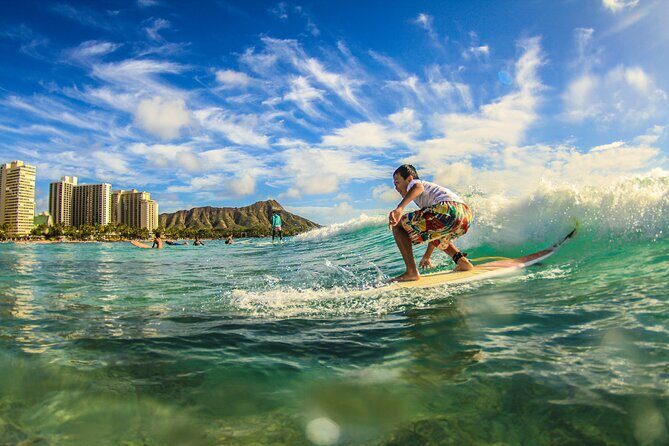
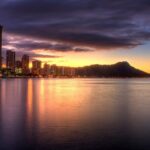
Sunrise photos need a plan, and Oʻahu delivers. This Golden Hawaii sunrise photo tour focuses on the Pacific Ocean glow plus real coaching from a professional photographer guide. I love how the route lines up famous viewpoints with photo guidance, but one thing to consider is that it’s not a private, guide-only photo session for your selfies.
You’ll get round-trip hotel transport (from selected Waikiki hotels) and a small group vibe with a max of 7 travelers, which makes it easier to ask questions and reset your camera. At the end, you finish with a Leonard’s Bakery Malasada truck stop—simple, warm, and very worth the early start.
In This Review
- Key Things That Make This Oahu Sunrise Photo Tour Special
- Sunrise Over Oʻahu: What You’re Really Paying For (and Getting Back)
- Pickup, Small Group Rhythm, and Your Start Near Honolulu Zoo
- Sandy Beach Park at Sunrise: The Moment Everyone Comes For
- Makapuʻu Point for Panoramas: When the Sun Changes the Angle
- Halona Blow Hole: Volcanic Shapes and Wildlife With Sunrise Light
- The Leonard’s Bakery Malasada Truck Stop: A Sweet Photo-Morning Reward
- Phone Photography Tips That Stick After You Leave
- What the Views Teach You About Choosing Your Own Photo Spot
- Who Should Book This Tour (and Who Might Prefer Something Else)
- Should You Book Oʻahu Photo Tours Sunrise Photo Tour?
- FAQ
- How long is the Oʻahu sunrise photo tour?
- How much does the tour cost?
- Is hotel pickup included?
- Where does the tour start?
- What stops are included?
- What’s included with the price?
- Is food included?
Key Things That Make This Oahu Sunrise Photo Tour Special
- Stops built for sunrise light: Sandy Beach Park for the main show, then Makapuʻu Point and Halona Blow Hole for angle changes.
- Real hands-on phone help: Many guides, including Kurt (and others like Andrew, Alex, or Calvin), help you work your iPhone camera.
- You’re not on your own: The guide takes free photos too, so you’re not betting everything on your own timing.
- Small group max (7): Easy to get attention without feeling herded.
- One included Leonard’s malasada: A sweet win after you’ve been up early and out shooting.
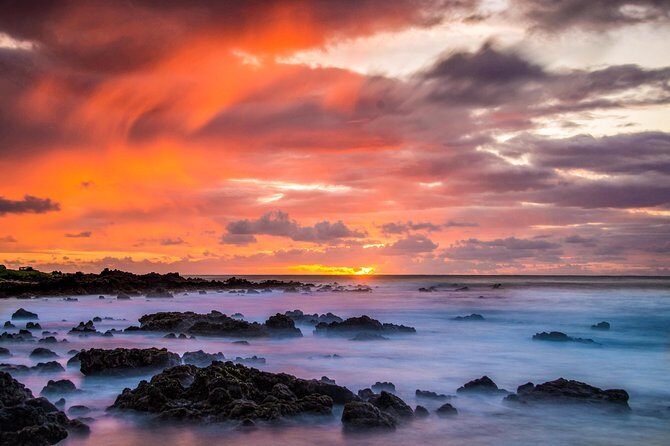
Sunrise Over Oʻahu: What You’re Really Paying For (and Getting Back)
For $70 per person, this tour is mostly about buying time and guidance. You’re paying for an early-morning route, someone who knows where to stand when the light hits, and photo tips you can actually use right away.
In the morning, conditions matter. The difference between a good sunrise photo and a forgettable one is often where you’re positioned and what you do in the first minutes of light. This tour gives you the structure to capture that moment at multiple viewpoints, not just one quick stop.
I also like the practical extras. You get hotel pickup and drop-off (for selected Waikiki hotels), the group stays small, and you receive free photos from the guide. That last bit matters more than it sounds. When you’re working your own camera, you can miss your best angle. Having a backup from the guide helps you walk away with more usable shots.
The main “watch out” is expectation. If you want the guide to constantly take photos of you like a dedicated personal photographer, this isn’t priced or run that way. The purpose is a guided experience to help you take strong images yourself. If you’re hoping for a private photo shoot, you might end up frustrated.
You can also read our reviews of more photography tours in Oahu

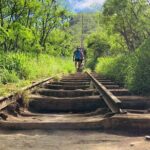
Pickup, Small Group Rhythm, and Your Start Near Honolulu Zoo
Your tour begins at Honolulu Zoo, 151 Kapahulu Ave, Honolulu, HI 96815, and ends back at the same meeting point. If you’re staying in Waikiki, pickup is offered at selected hotels, and you’ll need to confirm your exact pickup location by calling the provider directly.
That pickup detail is worth planning around because sunrise tours are tight on timing. If you’re late, the light doesn’t slow down for you. The good news: the ride is built in, so you’re not spending your morning figuring out parking, buses, or rideshares while everyone else is already framing their shot.
One more thing I appreciate: maximum 7 travelers. That small group size tends to translate into better pacing. You can ask questions, get feedback, and still keep moving. Nobody’s sprinting while you’re still trying to figure out your settings.
Dress-wise, they keep it simple: tropical dress code. Sunrise mornings can still feel cool, especially by the water, so a light layer you can put on and take off is a smart idea. Also, bring your phone fully charged. You’ll be there long enough to burn battery if you’re taking bursts and video.
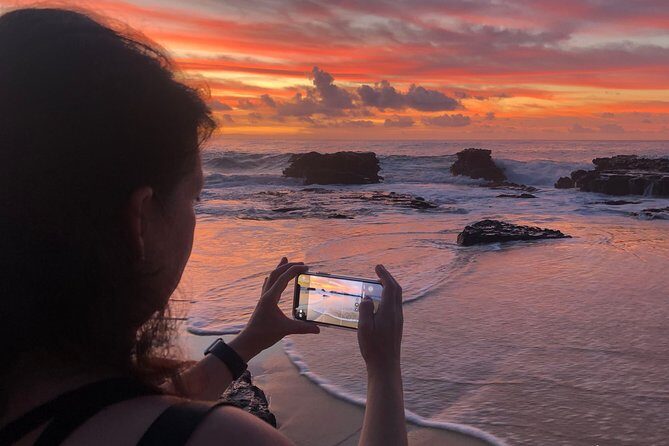
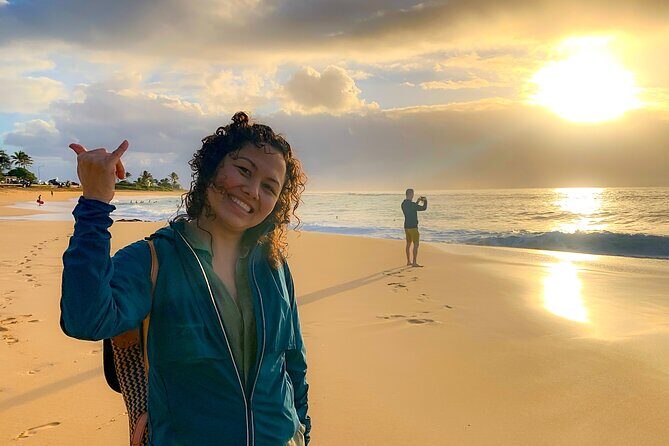
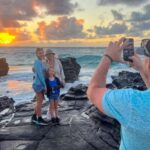
Sandy Beach Park at Sunrise: The Moment Everyone Comes For

The tour’s first stop is Sandy Beach Park, and it’s where the sunrise focus really lands. Plan on about 45 minutes here, which is long enough to get multiple angles without feeling like you’re constantly rushing.
Why this stop matters: Sandy Beach Park gives you a clean view of the Pacific Ocean direction. For sunrise, that’s the whole game. You want the sun’s path, the horizon, and the ocean all working together in the frame.
Here’s what I find useful when I’m trying to photograph sunrise: you want to control two things—your timing and your composition. The guide’s job is to help you do both. Based on what people say about guides like Kurt, the coaching tends to be patient and practical, especially for iPhone users. You’ll get help thinking through what to capture and how to use your phone to do it.
A practical consideration: you’ll be outside, and everyone is watching the sky at once. It can feel cold and still while you wait for that first change in color. If you’re hoping for a dramatic “instant fireball” sunrise, you might be surprised how quickly it becomes more interesting as the light shifts. That’s why staying the full window matters.
Makapuʻu Point for Panoramas: When the Sun Changes the Angle
After Sandy Beach Park, you move to Makapuʻu Point for about 20 minutes. This is a shorter stop, so treat it like a targeted photo break: arrive, find your angle, shoot a few variations, and be ready for the guide to adjust where you’re standing.
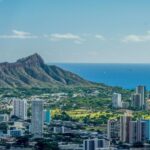
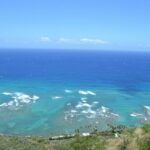
Makapuʻu Point is all about opening your view. Instead of focusing only on the horizon line and the sun, you start including bigger context—how the Windward side of Oʻahu looks at morning light.
What’s valuable here isn’t just the view; it’s the chance to switch your photo style. At Sandy Beach Park you’re likely shooting tighter, ocean-forward compositions. At Makapuʻu, you can try wider shots that show more of the coastline and the depth of the scene.
Also, because the stop is brief, it rewards people who are quick with their phone setup. If you’re still learning how to stabilize your grip or how to frame quickly, the guide’s tips become more important. Multiple guests call out that the guide walks people through phone camera techniques and helps you get better results fast.
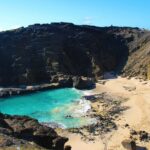
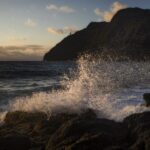
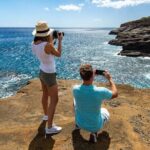
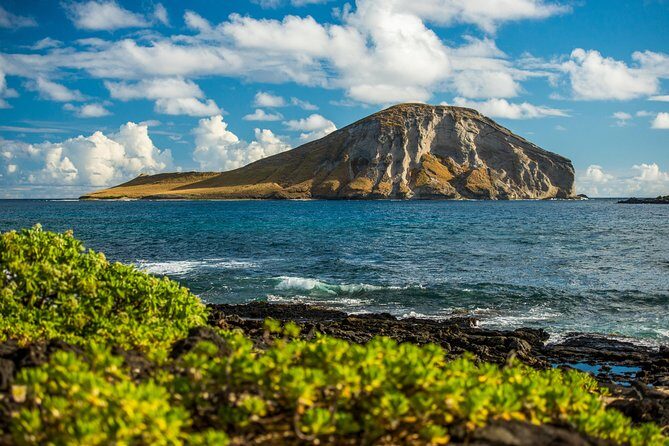
Halona Blow Hole: Volcanic Shapes and Wildlife With Sunrise Light

Next up is Halona Blow Hole for around 20 minutes. This stop adds a different flavor: volcanic features and the chance to notice wildlife as you head into sunrise conditions.
From a photography standpoint, this is where your background matters. By now, your eyes are used to the horizon view. Halona can give you textures, rock shapes, and movement possibilities—things the ocean light makes dramatic.
Even if you’re not chasing a single perfect “blow hole eruption” shot, the area is great for creating photos that feel more like Oʻahu. Instead of only showing the sun, you add story: coastline, geology, and the motion of morning.
One more practical point: with short stops, the guide’s pacing is essential. If you’re walking slowly or stopping frequently to review images, you might feel behind. If you tend to overthink your photos in the field, give yourself a simple plan: shoot 5–8 quick frames, review, then adjust once.
You can also read our reviews of more tours and experiences in Oahu


The Leonard’s Bakery Malasada Truck Stop: A Sweet Photo-Morning Reward
Then you hit the highlight you can smell before you see it: Leonard’s Bakery Malasada truck. You’ll have about 20 minutes, and one malasada is included.
This isn’t just a snack break. It’s part of the tour’s payoff after you’ve done the early-morning work. People describe the malasadas as similar to donuts or beignets, and they often mention variety of flavors. Either way, the main idea is simple: you finish with something warm and handheld so you can keep your energy up without hunting for food nearby.
If you’re thinking about value: a guided sunrise tour is often “paying for the experience,” which can feel abstract. The included malasada makes the morning feel complete. You’re not just consuming scenery—you get a local treat you can talk about later.
One note: food and drinks aren’t included, so if you know you’ll want water, coffee, or something more filling, plan ahead. At minimum, keep yourself hydrated during the early start.
Phone Photography Tips That Stick After You Leave
Most people book this kind of tour for one reason: they want better photos without becoming a camera expert overnight. This tour aims for that, especially for iPhone photography.
From past experiences described with guides like Kurt, the instruction tends to be hands-on and encouraging. The guide doesn’t just point and say go shoot. They help you use your phone in a more intentional way. People specifically mention learning tips and tricks with iPhone camera use, and leaving feeling like they improved quickly.
Also, you’re not limited to your own shots. Since the tour includes free photos from the guide, you’ll likely end up with images you couldn’t easily capture yourself—like certain angles, group moments, or frames where you were focused on composing.
That said, here’s the balanced reality check: the guide’s main role is to help you take your own great images. They do take photos too, but this is not a constant, personal-photo-shoot service where someone holds the camera for you every minute. If you’re traveling solo and your priority is being photographed by someone else, you may want to set expectations carefully.
A simple approach that works: tell the guide what you want to practice. For example, ask for help with framing the horizon, or how to shoot the sun without losing detail. Then spend your next few minutes applying the advice. That’s how you turn a tour into skills.
What the Views Teach You About Choosing Your Own Photo Spot
By the end, you’ve essentially done a quick “visual training session” on Oʻahu sunrise photography. You started with ocean-facing sunrise framing at Sandy Beach Park, then switched to panoramic context at Makapuʻu Point, and finished with volcanic texture and dramatic coast scenery at Halona.
That sequencing matters because each place teaches a different photography habit:
- Sandy Beach Park teaches horizon alignment and patience for color changes.
- Makapuʻu Point teaches wider compositions and using the environment to add depth.
- Halona Blow Hole teaches you to include texture and shape, not just the sun.
If you like taking photos as a hobby, you’ll likely leave with more confidence. If you’re more casual, you’ll still get a folder of usable images because the route and timing are built around sunrise conditions.
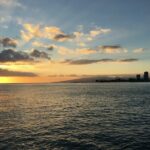
And you’ll see Waikiki from a different angle mentally too. The early morning light helps everything look less like a checklist and more like a place you actually stand in.
Who Should Book This Tour (and Who Might Prefer Something Else)
This is a great fit if:
- You want a guided sunrise photo experience without doing guesswork on timing and viewpoints.
- You’re traveling with a partner or a small group and want shared photos plus personal guidance.
- You mainly shoot on your phone and want practical coaching.
- You want hotel pickup in Waikiki and a smooth morning with minimal planning.
It might not be ideal if:
- You’re expecting a dedicated personal photoshoot where the guide only focuses on taking your picture the whole time.
- Your main goal is portraits of yourself, not learning how to photograph scenes (and likely both).
For mixed groups and families, it tends to work well because the tour is short stops, not a long hike. It also has a calm, guided pace rather than a sprint. And people mention that guides make guests feel comfortable, even with different energy levels.
Also, the tour is designed for most travelers to participate, and service animals are allowed.
Should You Book Oʻahu Photo Tours Sunrise Photo Tour?
If you want one high-impact morning on Oʻahu that pays off in photos and local flavor, I’d recommend booking this. It’s strong value for a 3-hour window because you’re getting three sunrise-focused viewpoints, hotel transport, a professional photographer guide, and that included Leonard’s malasada treat.
The smartest reason to book is this: sunrise photography is not about owning better gear. It’s about knowing where to stand at the right time and how to translate what you see into a photo your phone can capture. This tour does that for you, with coaching you can actually apply immediately.
Quick decision tip: if you’re okay helping yourself take great shots (and you’re fine with the guide taking some photos too), you’ll probably love it. If your priority is being photographed constantly by the guide, consider a different kind of session.
If you’re weighing the risk of early timing, the tour offers free cancellation up to 24 hours in advance, so you can book with a little breathing room as your trip schedule firms up.
FAQ
How long is the Oʻahu sunrise photo tour?
It’s about 3 hours in total.
How much does the tour cost?
The price is $70.00 per person.
Is hotel pickup included?
Yes. Hotel pickup and drop-off are included, but pickup is only available at selected hotels in Waikiki. You’ll need to confirm your exact pickup location.
Where does the tour start?
It starts at Honolulu Zoo, 151 Kapahulu Ave, Honolulu, HI 96815.
What stops are included?
The tour includes stops at Sandy Beach Park, Makapuʻu Point, Halona Blow Hole, and then Leonard’s Bakery Malasada truck.
What’s included with the price?
You get a professional photographer guide, free photos from the guide, hotel pickup and drop-off, and 1 Malasada.
Is food included?
No. Food and drinks are not included, but the malasada is.