REVIEW · OAHU
Exclusive Group Surfing Lesson with Waikiki Courtesy Shuttle
Book on Viator →Operated by Ohana Surf Project · Bookable on Viator
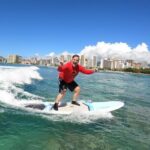
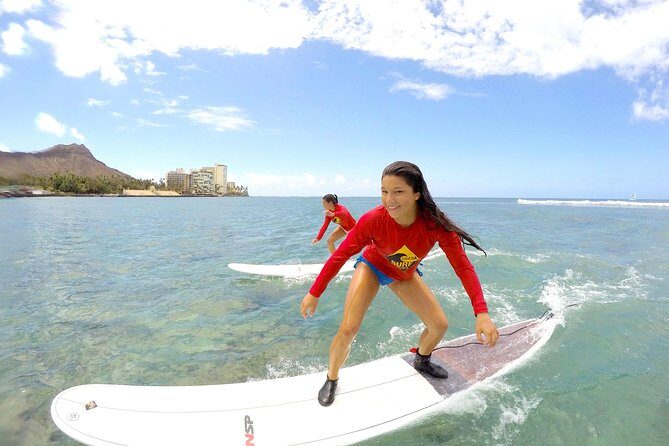
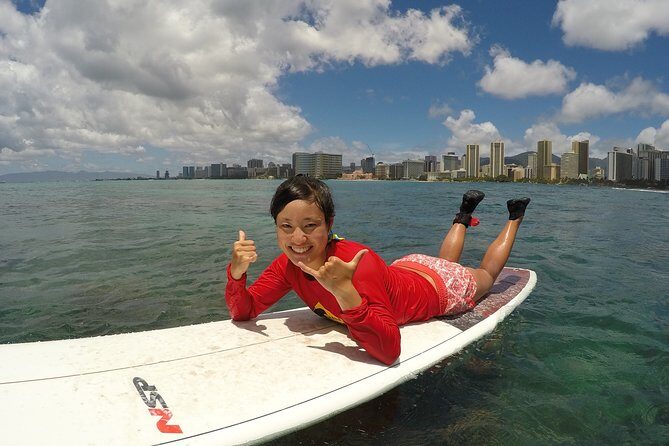
Waikiki waves, learned fast. This Waikiki Beach surf lesson keeps things simple: you get pickup from select hotels, ride to the surf center, then head straight to the lineup. I especially like the courtesy shuttle setup that removes the guesswork. One thing to keep in mind: even with a group format, the class size can feel busy on the beach, which can mean fewer actual runs for each person.
I also like how the lesson is built for beginners without babying you. You’ll do basics on land first, then get coached in the water based on your comfort level and swimming strength. If you’re hoping for a true one-on-one experience, don’t assume it’s quiet and private; it’s more like a well-run surf class where you learn fast and move on.
In This Review
- Key things to know before you paddle out
- Getting picked up in Waikiki: the yellow bus plan that keeps things easy
- Ohana Surf Center check-in: gear, storage, and the safety briefing rhythm
- The sand session: learning how your body should move
- Into the water at Waikiki: leashes, positioning, and first-wave coaching
- How many waves you’ll actually catch (and why it still can be worth it)
- Photos, videos, and souvenirs: turning one session into a keepsake
- What $119 buys you in Waikiki (and when it’s a smart value)
- Who should book this Waikiki surf lesson
- Who should consider a different option
- Should you book this Ohana Surf Project lesson?
- FAQ
- How long is the surf lesson?
- Is pickup available in Waikiki?
- Where is the meeting point?
- What’s included in the price?
- Do I need to bring my own surfboard or gear?
- Is this a private lesson?
- What are the age and swimming requirements?
- What if I have a medical condition or injury?
- Are souvenir photos included?
- What is the cancellation window?
Key things to know before you paddle out
- Waikiki Beach practice: You learn and ride where the island’s surfing scene is front and center.
- Shuttle from select Waikiki locations: Air-conditioned transport to and from the beach area keeps your schedule tight.
- Full gear plus reef shoe support: Rash guard, reef shoes, and a surfboard are included, so you show up ready.
- Sand drills before water: You’ll practice the basics on land so the ocean part feels less random.
- Safety briefing is part of the flow: You get a formal talk before getting in, plus instructor check-ins.
- Photos and video are optional: You can buy souvenirs after your session, and they’ll be ready at the surf center.
Getting picked up in Waikiki: the yellow bus plan that keeps things easy
The day starts with an organized meet-up at 2552 Kalākaua Ave (that’s the start/end point listed). If you’re staying in the right part of Waikiki, you can use their complimentary courtesy shuttle from select locations. You’ll get the exact pickup location and time by email, and you should aim to contact the operator if you haven’t received details about a day before.
What you’re looking for is the easy-to-spot Surf School Bus. It’s described as a clean, air-conditioned yellow bus with the surf school branding, plus there’s also a white shuttle with their logo. In real-world terms, this matters because Waikiki traffic and parking can eat time. The bus setup protects your energy for the water, not the scramble to find the right street at the right minute.
Once you’re on board, you’ll be shuttled to the Ohana Surf Center at the Waikiki Beach Marriott area. That’s a helpful base because it’s where you’ll check in, gear up, and do the safety briefing before heading to the actual shoreline. After the lesson, you return the same way—back to the center for photos/merch, then back to designated drop-off locations.
You can also read our reviews of more tours and experiences in Oahu

Ohana Surf Center check-in: gear, storage, and the safety briefing rhythm
After you arrive at the Ohana Surf Center, expect a quick but structured start. You’ll check in, and then you’ll get geared up with what you need for Waikiki conditions: a rash guard, reef shoes, and a surfboard (all included). You’ll also have access to a safe place to store your belongings, which is a quiet relief. Surf lessons are short, but the stuff you bring—phone, wallet, keys—needs a home.
A safety briefing happens before you go out. You’ll watch it as part of the process, then move on to meet your instructor. This matters because surf coaching isn’t just about where to stand. It’s about how to handle the water responsibly: how to move with your board, where to focus, and how to stay aware of other surfers and the ocean’s mood.
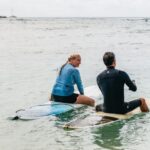
Then comes the personal part. You’ll talk with your instructor about what you’ve done before, your swimming strength, and any concerns or conditions that the staff should know about. If you have medical conditions or injuries, you’re expected to advise them ahead of time. If you can’t swim, the guidance says you should flag that too, since the team may recommend a private lesson instead. That’s a big deal for safety and for how the lesson gets tailored.
The sand session: learning how your body should move
Before you hit the water, you’ll walk your lesson board down to the beach once you’re comfortable. That’s not just for logistics. Carrying the board helps you get familiar with its weight and shape before the ocean adds chaos.
On land, you get instruction focused on the basics and technique. The goal is to help you avoid the most common beginner mistake: treating surfing like standing up anywhere, any time. You’re learning how your stance works with balance, how to handle the board, and what to do when you feel unstable. Since the lesson is designed for beginners, this is where the confidence gets built.
You’ll also get your instructor’s guidance right from the start. One thing I like about this structure is that you’re not thrown into the water and told to figure it out. You’re building a mental checklist first: where your feet should go, how to manage your timing, and how to understand what the wave is doing relative to you.
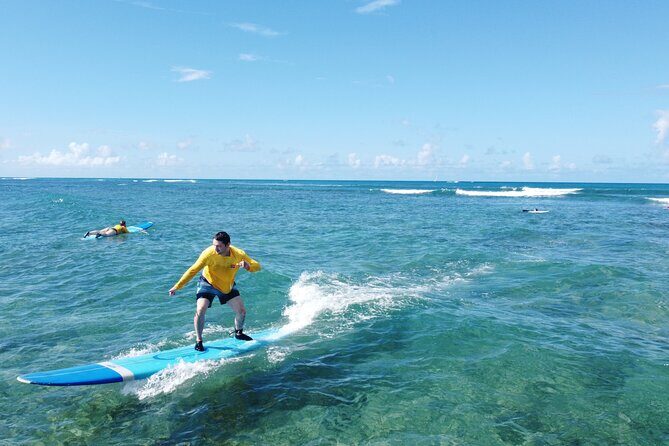
Into the water at Waikiki: leashes, positioning, and first-wave coaching
Once you’re at the shoreline, it’s time for the real part. You’ll meet your instructor, leash your board, and go into the water. The instructor guidance is aimed at safety first, then wave skills. The lesson flow is geared toward helping you catch waves without losing your nerve.
Your instructor will position you, and that positioning can make a huge difference. In feedback, one instructor named Kevin is specifically mentioned for being attentive and for helping a beginner get set up effectively—so you can focus on standing instead of guessing what to do next. Of course, you can’t plan on a specific instructor every time, but the overall teaching style is clear: they work to match you to the situation, not just hand you a board and wish you luck.
You’ll also get coaching based on your swimming strength and comfort. That means the lesson doesn’t treat everyone the same. If you’re a stronger swimmer, you might get more confidence in how you move with the board. If you’re nervous, the instructor will likely spend more time on positioning and reassurance. Either way, you’re being supervised.
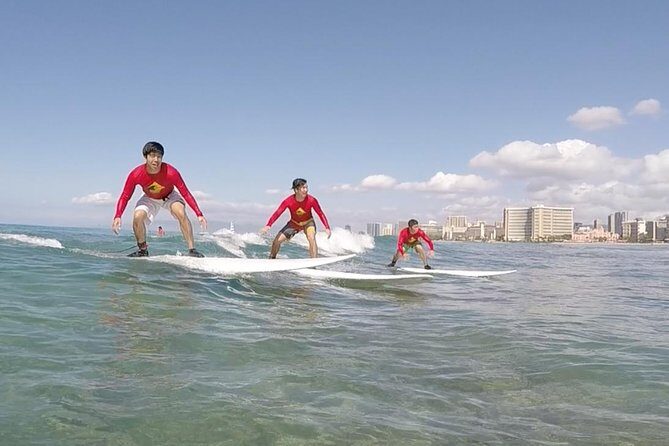
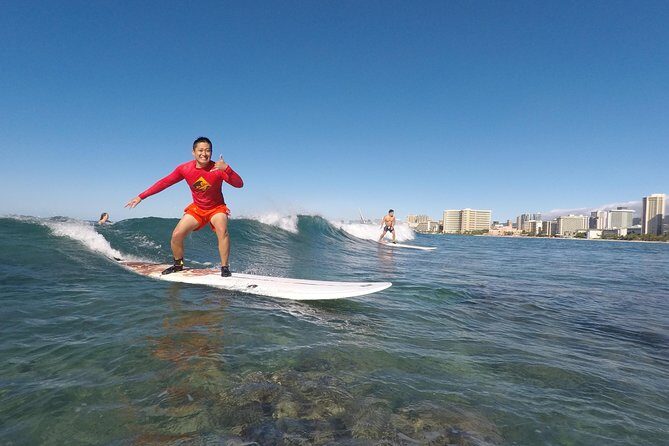
One practical note: this is a group class. A five-star rating can still include trade-offs. One person noted they didn’t get a huge number of runs because the group was larger on their day (around 20–30 people). Another person in a smaller group reported a smoother experience and solid wave attempts. Translation: expect a lively learning environment, and don’t rely on a fantasy schedule of unlimited rides.
How many waves you’ll actually catch (and why it still can be worth it)
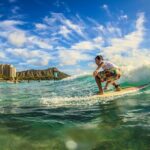
Surf lessons are paced by ocean conditions, not by wishful thinking. That affects everyone. In feedback, a common theme is that even first-timers can stand up with the right guidance, but the number of attempts per person varies.
If your goal is sheer volume—tons of waves in 2 hours—manage expectations. With group instruction, you’ll spend time moving between the center and the beach, listening to the briefing, doing sand practice, and waiting your turn. On one day, you might get fewer runs because more people are in the session. On another day, with fewer participants, you’ll likely feel like you’re closer to the action more often.
Here’s the good news: what you’re paying for isn’t just wave counts. It’s the coaching and setup that gets you to your first real attempts with less frustration. The included gear helps too. Reef shoes and a rash guard keep you comfortable, and the surfboard is part of the learning equation. If you’ve never done it before, the benefit of not figuring gear out on your own can be huge.


Photos, videos, and souvenirs: turning one session into a keepsake
After your time in the water, you’ll return to the Ohana Surf Center. That’s where you’ll check out photographs and videos, and where you can buy merch if you want. The key point: you don’t have to hope someone remembered to capture you. The process is set up so that you’ll have footage to review afterward.
In feedback, people talked about loving the video and photo options, especially for families. If you’re surfing with kids or traveling with non-surfing friends, it’s a nice way to bring the memory back home and share it right away.
If you’re on a tight budget, treat souvenir photos as optional. The lesson itself is the value play; the photos are an added bonus.
What $119 buys you in Waikiki (and when it’s a smart value)

At $119 for about 2 hours, the biggest value is what’s included, not just the price tag. You get:
- a professional instructor
- equipment (rash guard, reef shoes, surfboard)
- storage for belongings
- transportation to and from designated Waikiki meeting points
- taxes and fees
For many people, that’s the difference between a fun lesson and a complicated day. In Waikiki, getting in and out can be the hardest part. Here, the shuttle and organized center-to-beach flow reduce friction. You arrive ready, you get coached, and you go back without figuring out buses, parking, or how to carry gear.
It also helps that the lesson is aimed at real beginners and nervous first-timers. The instruction structure—sand first, water second—cuts the learning curve. If you want a private lesson or you can’t swim, the setup notes that a private lesson may be recommended. In that case, you’d likely pay more. So for many travelers who meet the swim and age requirements, this group format is a solid entry point.
Who should book this Waikiki surf lesson
This experience fits best if you:
- want a first-time surf lesson in a famous place (Waikiki Beach)
- can swim and are comfortable being in ocean water
- want equipment included and don’t want to shop or haul gear
- like the idea of learning with supportive instruction and a group vibe
It’s also great for families. Feedback includes stories of dads and teens, and kids learning with encouragement and patience. Age guidance says all students must be 13 or older, so younger kids would need a different option.
Who should consider a different option
If you want quiet, private coaching with no group energy, you might find this less aligned. It’s listed as a private tour/activity for your booking, but the class still works like a surf lesson with multiple participants, and at least one person described their session as a larger group.
If you can’t swim, flag it ahead of time. The tour guidance says that a private lesson may be recommended, which would make sense for safety and instruction pacing.
If you’re prone to seasickness, plan ahead. The guidance suggests bringing a remedy you’ve used before (and checking with your doctor for advice). That’s a practical call, even though the lesson is beach-based.
Should you book this Ohana Surf Project lesson?
I’d book it if your priority is learning to stand up with real coaching in Waikiki, while keeping logistics simple. The included gear, the shuttle support, the sand-to-ocean structure, and the organized center setup are a strong combo for first-timers.
I’d hesitate if you’re the type who needs a quiet, almost private feel, or if you’re counting on unlimited wave time. With a group lesson, the rhythm of the day and ocean conditions shape how many runs you get.
If you come ready (bathing suit on, towel in hand, sunscreen applied), this is the kind of activity that can turn a vacation afternoon into a real skill—and a story you’ll keep retelling.
FAQ
How long is the surf lesson?
It runs for about 2 hours.
Is pickup available in Waikiki?
Yes. Complimentary transportation is available from select Waikiki locations. The exact pickup location and time are emailed to you.
Where is the meeting point?
The start (and end) point listed is 2552 Kalākaua Ave, Honolulu, HI 96815, USA.
What’s included in the price?
The lesson includes a professional instructor, equipment (rash guard, reef shoes, and surfboard), taxes and fees, a safe place to store belongings, and transportation to and from designated meeting spots.
Do I need to bring my own surfboard or gear?
No. Surfboard, rash guard, and reef shoes are included.
Is this a private lesson?
It’s a group surfing lesson. Your booking is for your group, but the experience is still run as a class with multiple participants.
What are the age and swimming requirements?
All students must be 13 or older and able to swim.
What if I have a medical condition or injury?
You should advise the staff ahead of time so they know what to account for during the lesson.
Are souvenir photos included?
No. Souvenir photos and video are available for purchase after the lesson.
What is the cancellation window?
You can cancel for a full refund up to 24 hours before the experience starts. Within 24 hours, the amount paid is not refunded.